
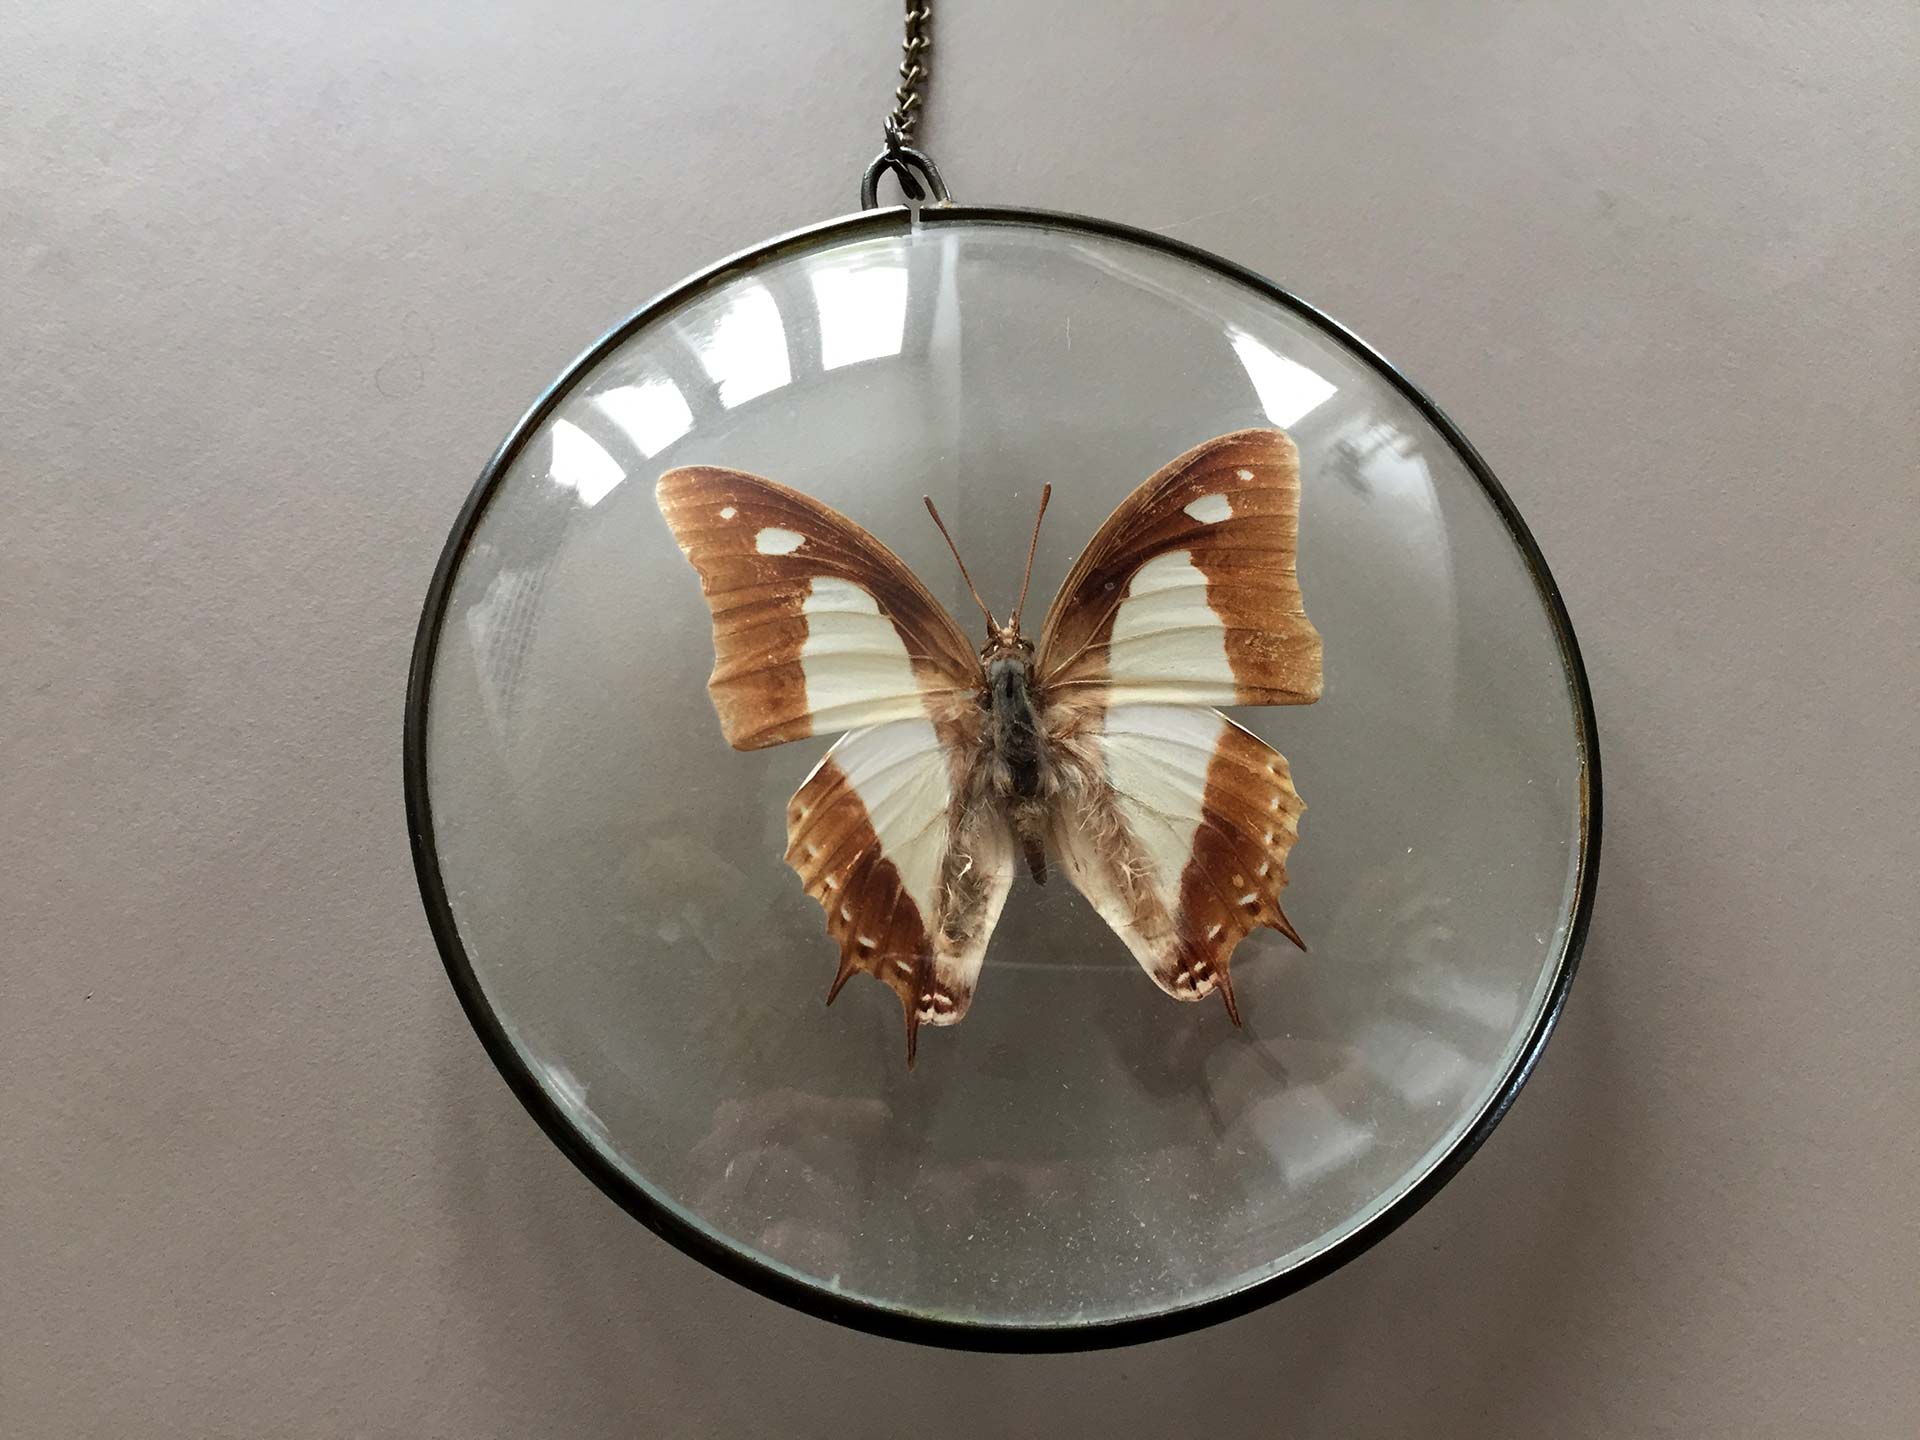
I inherited a wonderful butterfly from my grandmother. I love the simplicity of the frame. There is just nothing that distracts from the beauty of the butterfly and nothing that gets in your view.
With the birthday of my wife coming up, I decided I would like to present her with a more colorful butterfly, in a frame just like the old one.
It is easy to find and order butterflies on the internet. I bought mine from a shop specialized in taxidermy. As we found out later, these taxidermy shops are good if you look for specific species. If you just go for the looks, ebay has a wider offering and lower prices.
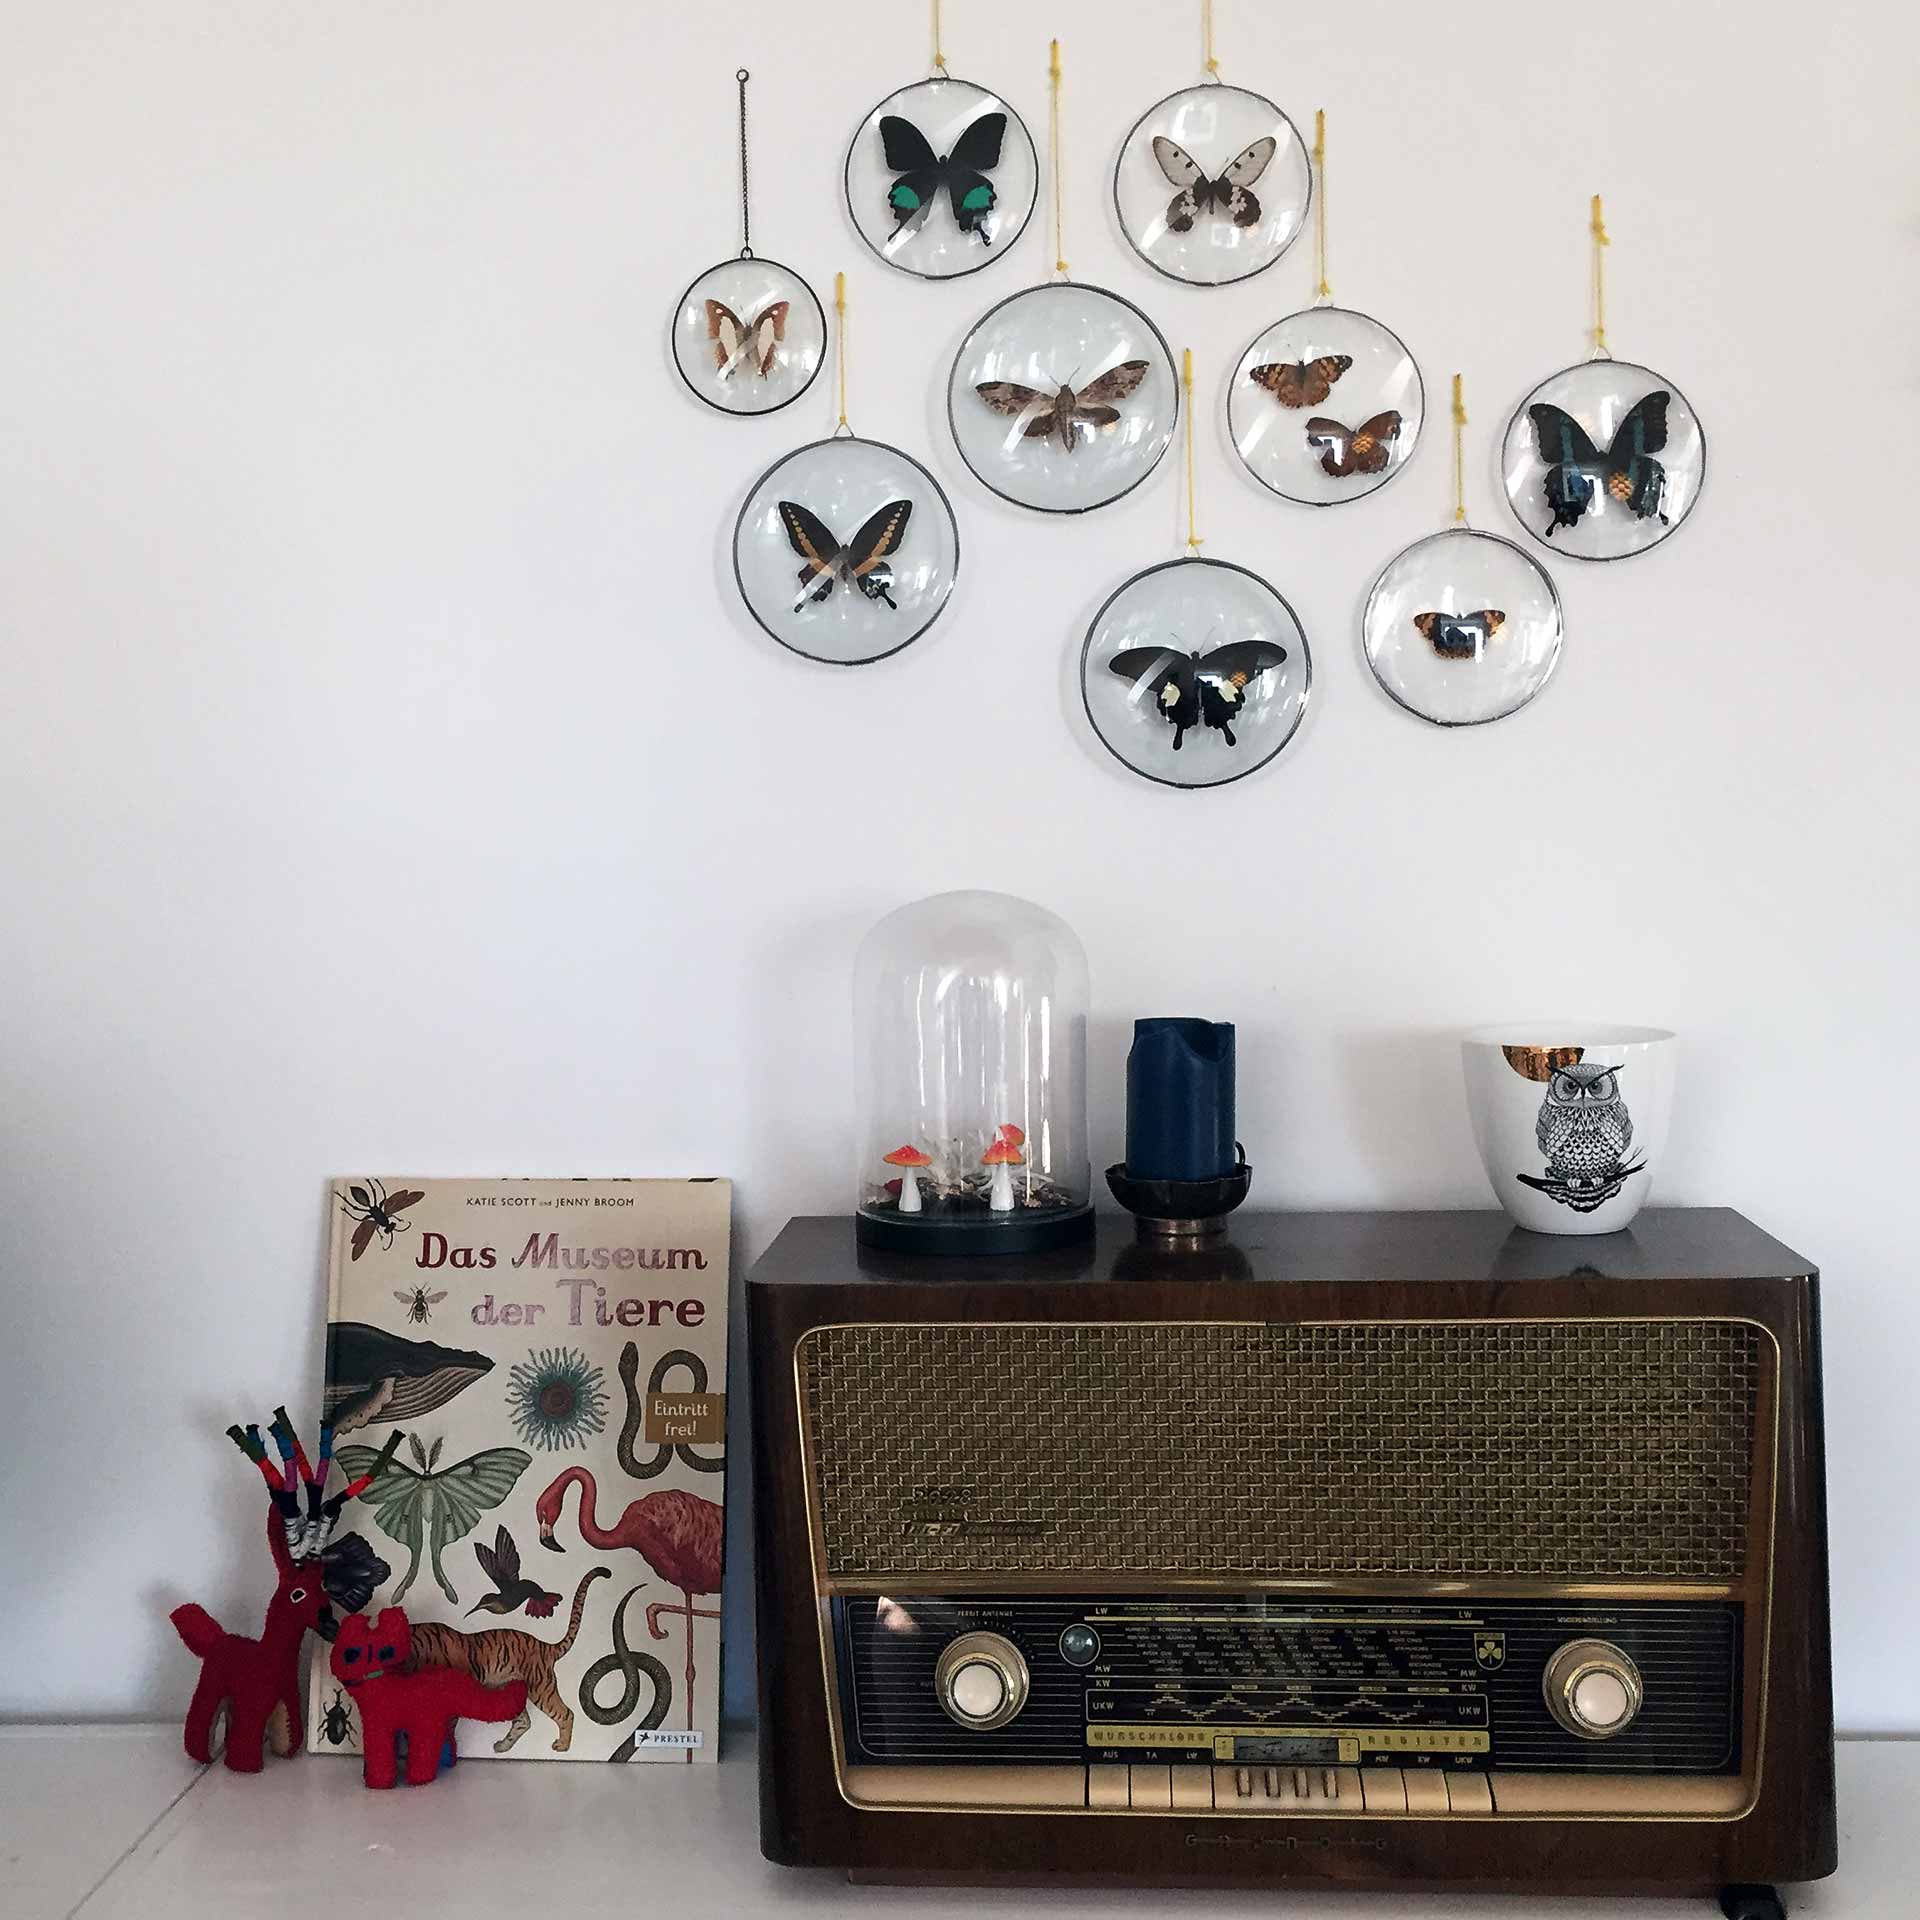
As it occurred, my wife bought herself a set of butterflies (and moths) mounted in a deep picture frame some time before her birthday. By that I could tell that I was on the right track with the bright blue butterfly I had gotten for her. But the pressure was on: My self made glas frame would have to beat the bought wooden framing.
I studied my grandmothers old frame very closely to come up with a plan on how to duplicate it:
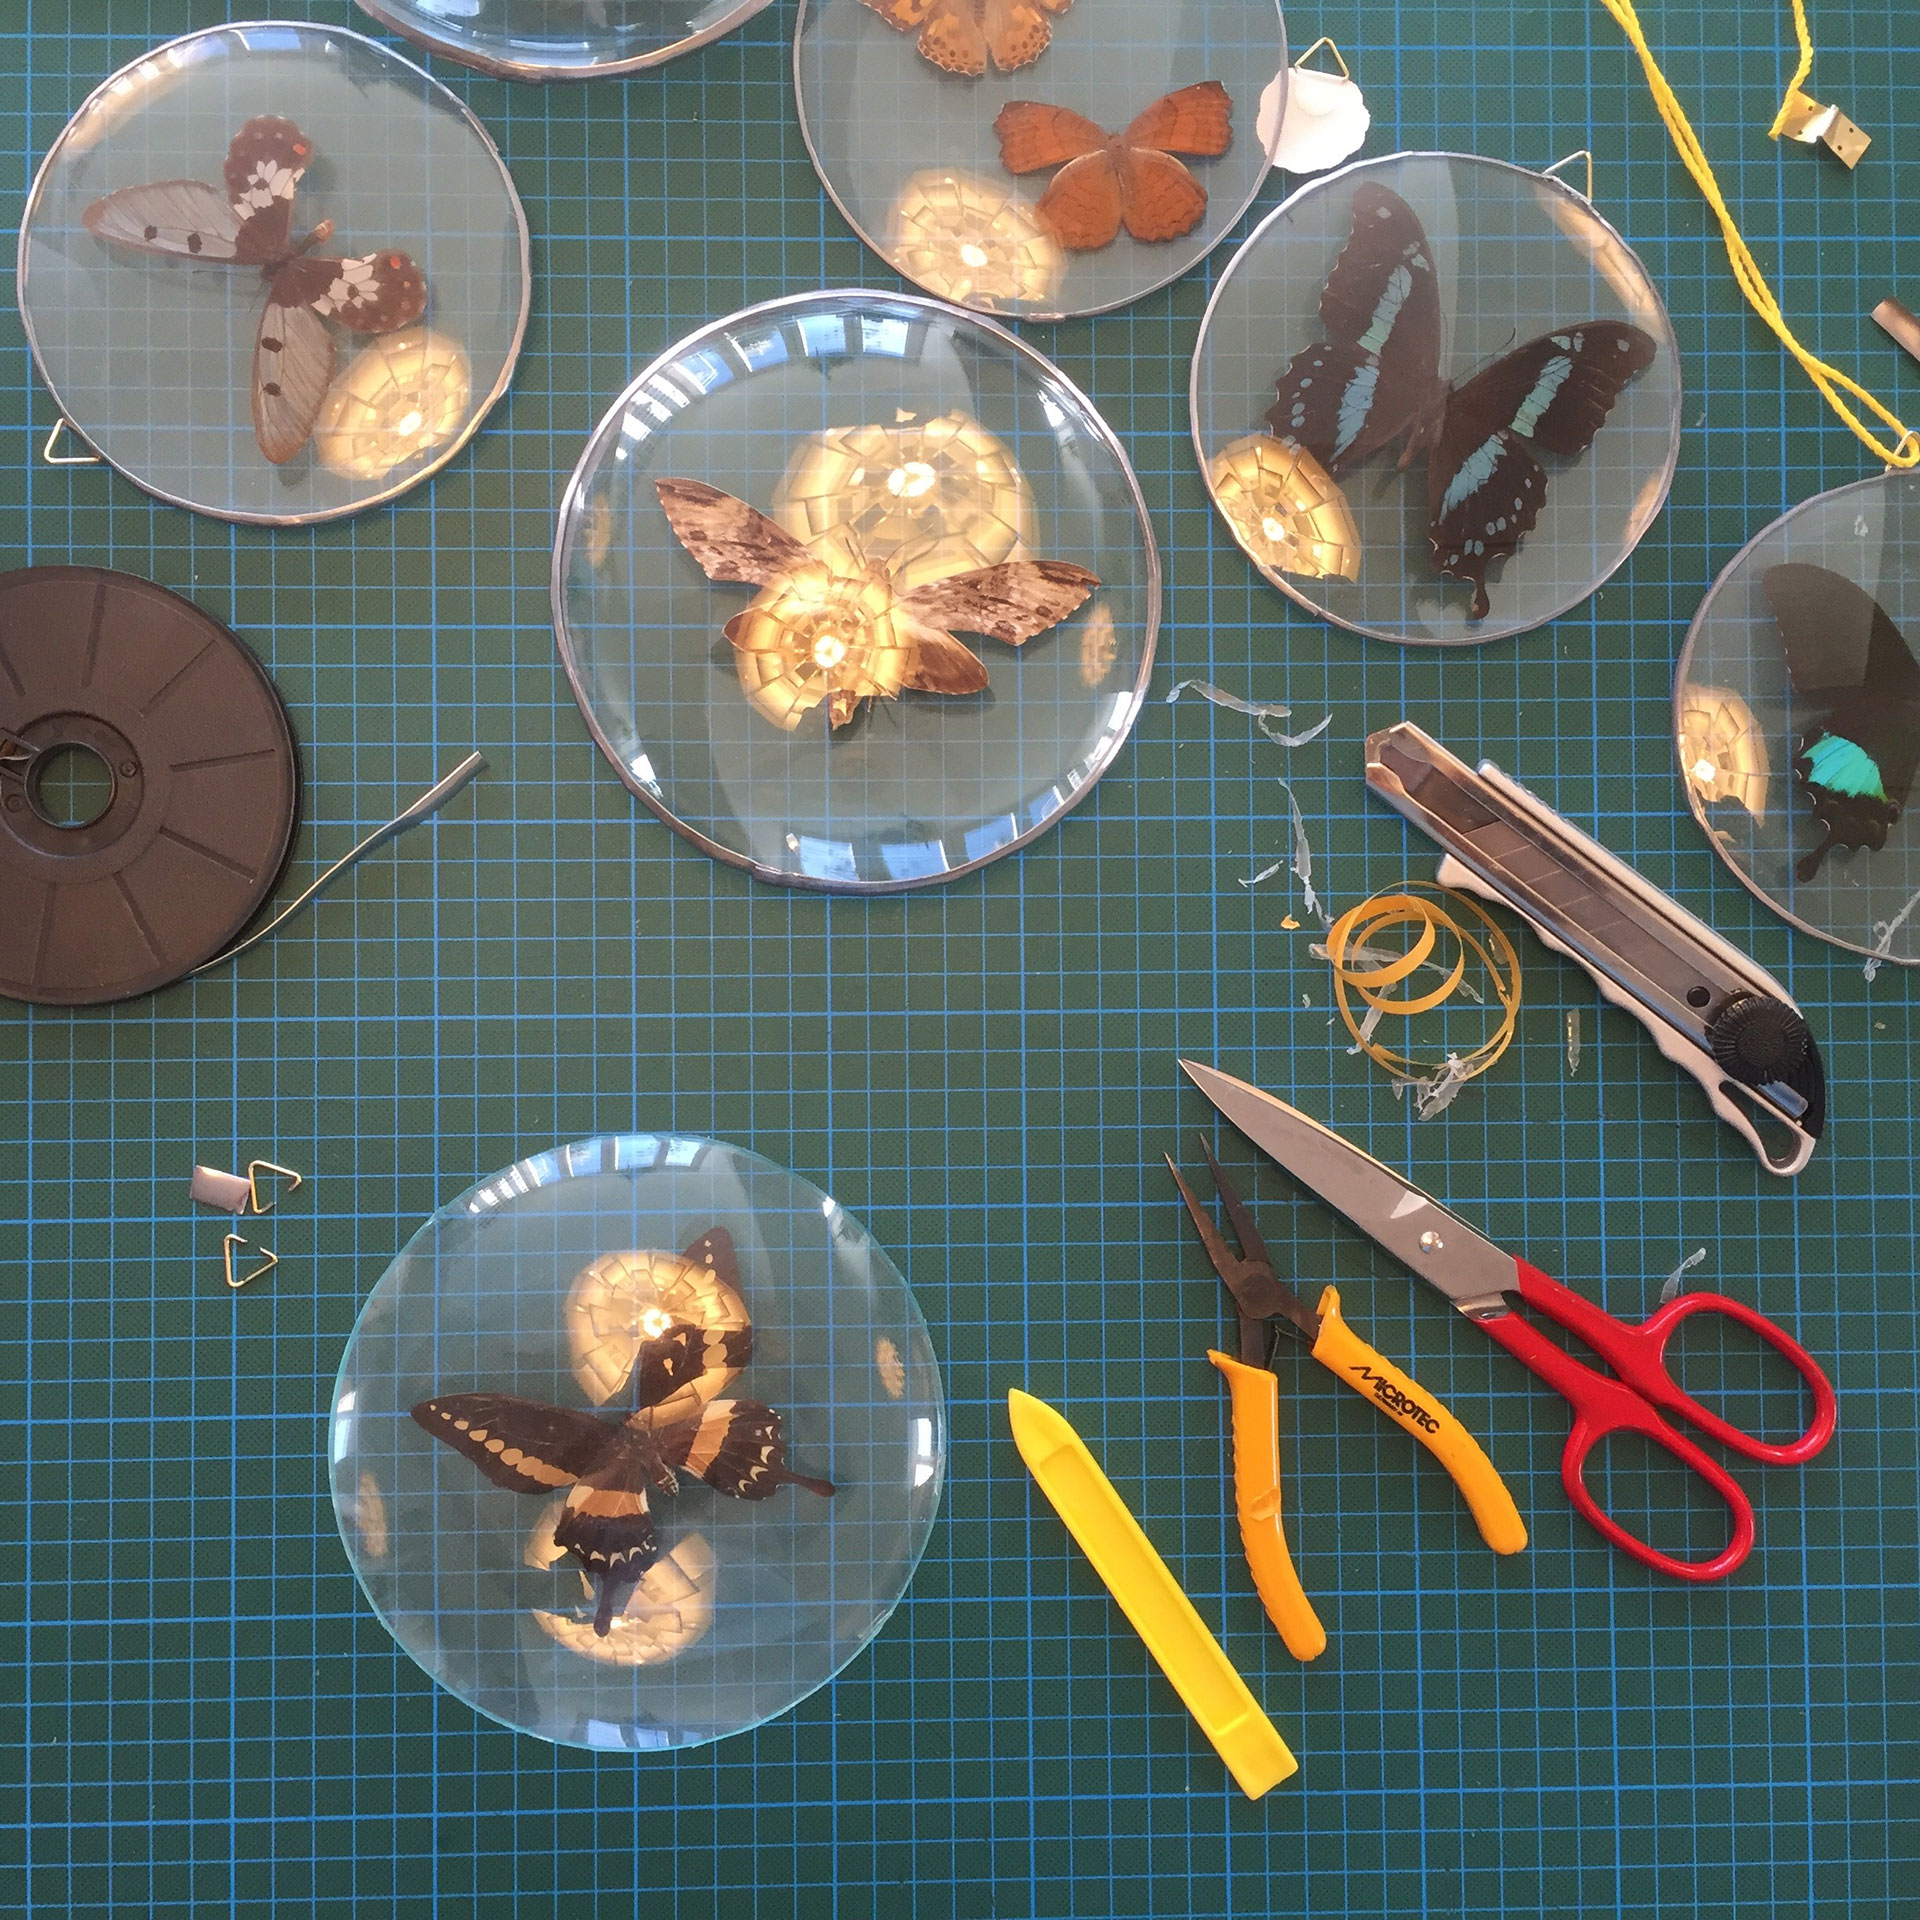
- As a mount for the butterfly, I would use round pieces of cork just like in the original.

- The glass housing was puzzling: I would need to construct it from two identical halves, but where would I find such glass bowls?
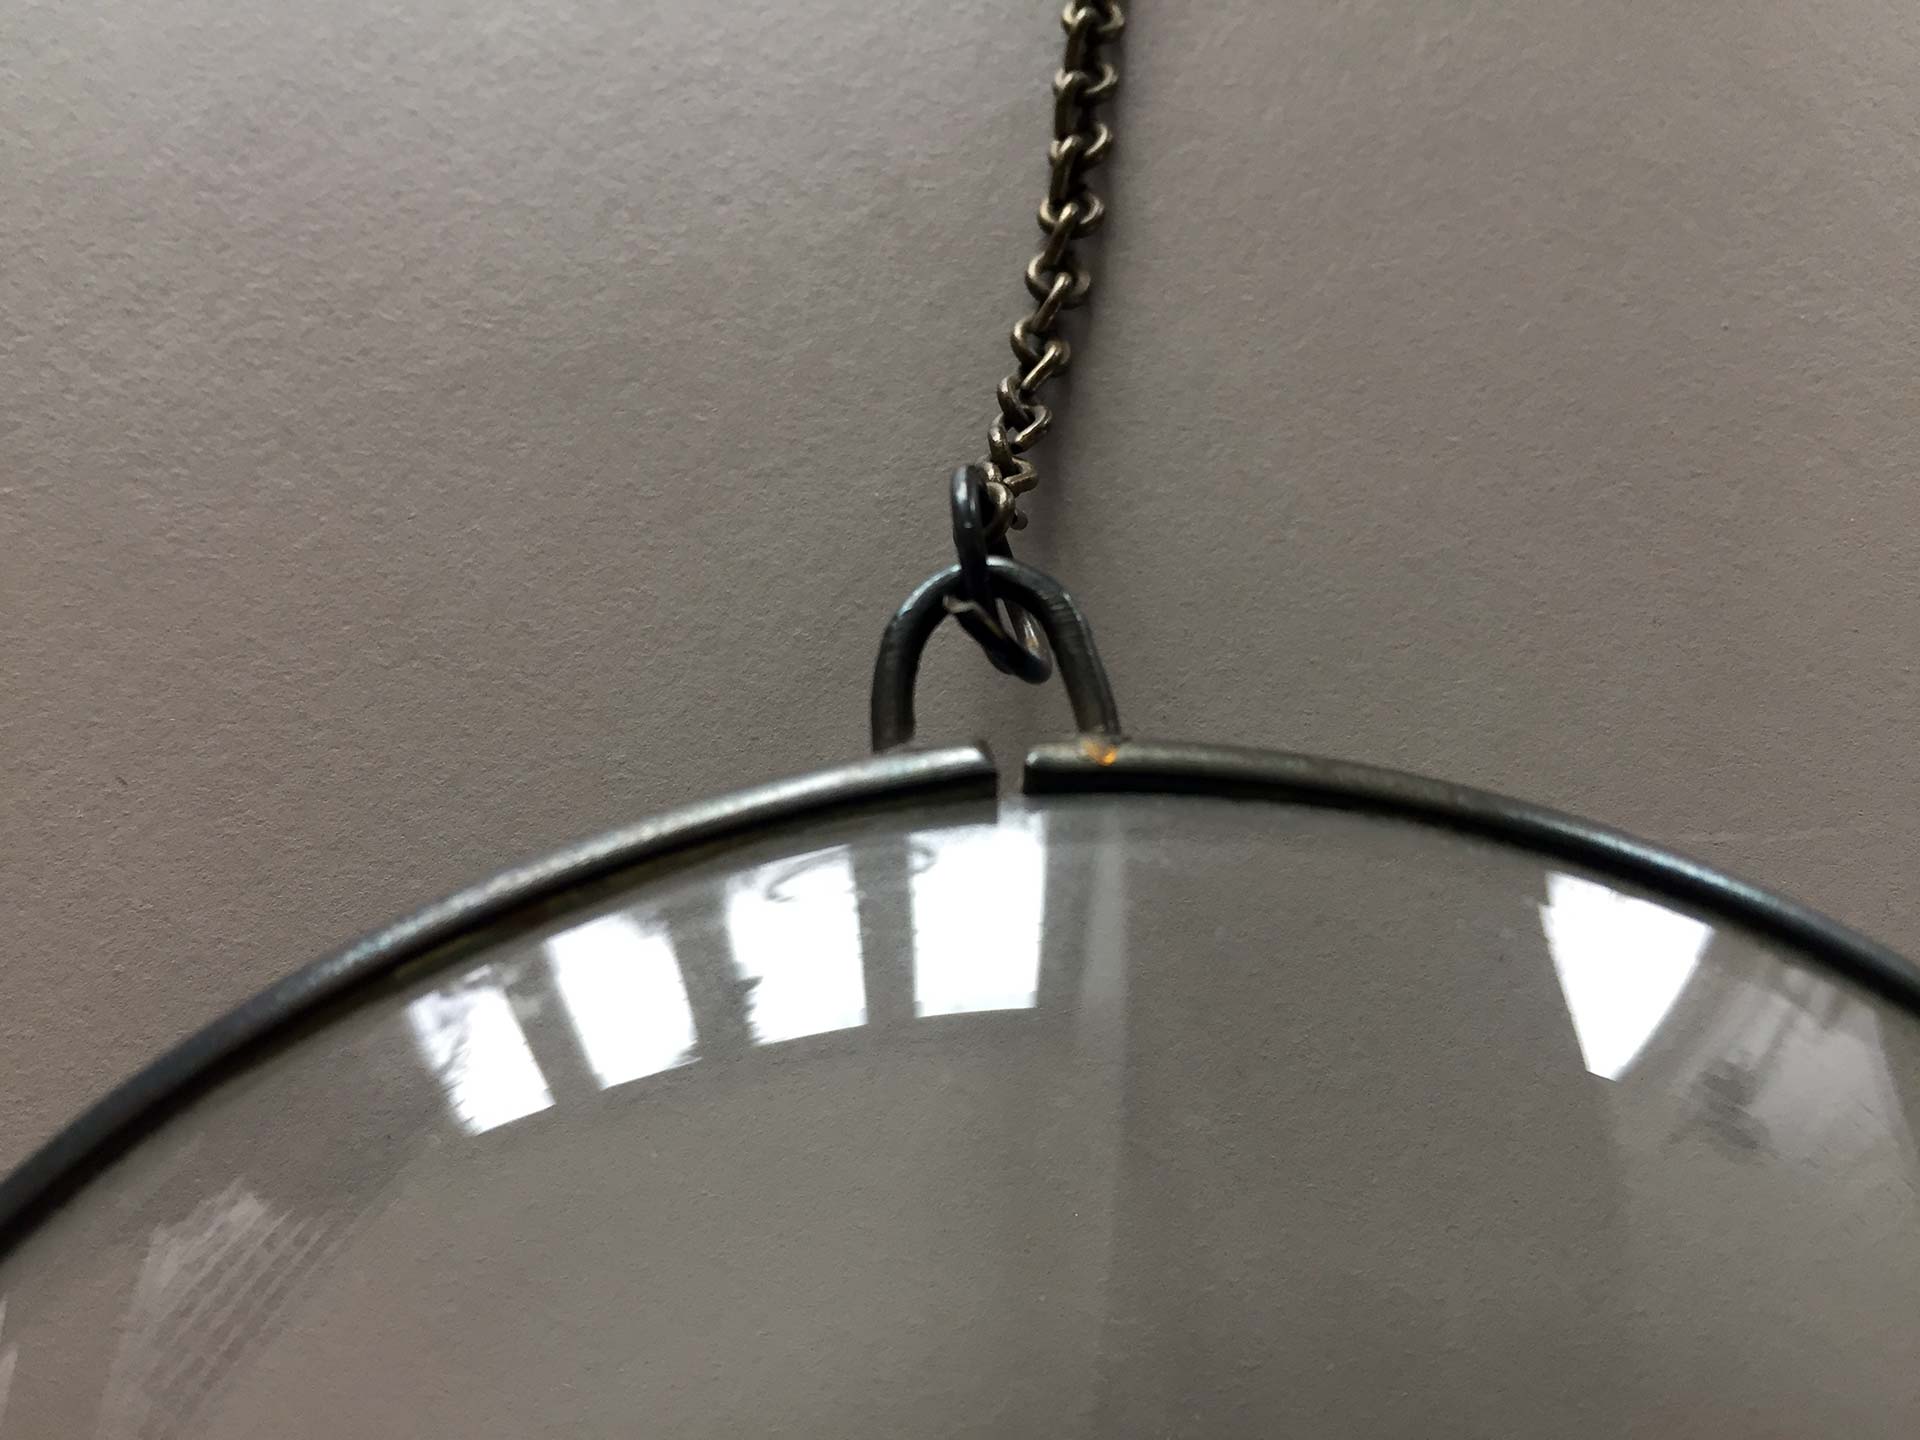
After lots of searching, I found out there is something called a “watch glass dish” (“Uhrglasschale” in German). This kind of glass is used in laboratories – typically to heat small samples of substances over a Bunsen burner. - I saw no way how I could reproduce the wonderful metal rim (including the little hanger) that was part of the original frame.

I would need to glue the two watch glasses together. After that, I would need some material to wrap around the rim to cover the two edges and the glue job. I opted for a narrow leather band, which I thought would look nice in combination with the glas. - As a last and separate thing, I would also have to add a hanger. I decided to go with glue on hangers, which I would stick to the back.
And then… well… to cut a long story short:
- The watch glass dishes did not make it in time for my wife’s birthday. I gave her my bare butterfly and a gift certificate for my hand built frame.
She liked the idea so much, that we quickly upped the order of watch glass dishes so that we could also reframe the butterflies she bought herself. - Later in the process, I found out that the leather bands did not look good at all. The leather was not really straight and the bottom side had this little fuzzy, unclean looking edge. For me, the way it looked was a big disappointment.
It took me some three more month (no kidding!) to ponder and search for something I could use instead. Finally I found the perfect solution: self-adhesive lead strips, which are usually used for things like Tiffany style lamp shades or simply leaded lights.
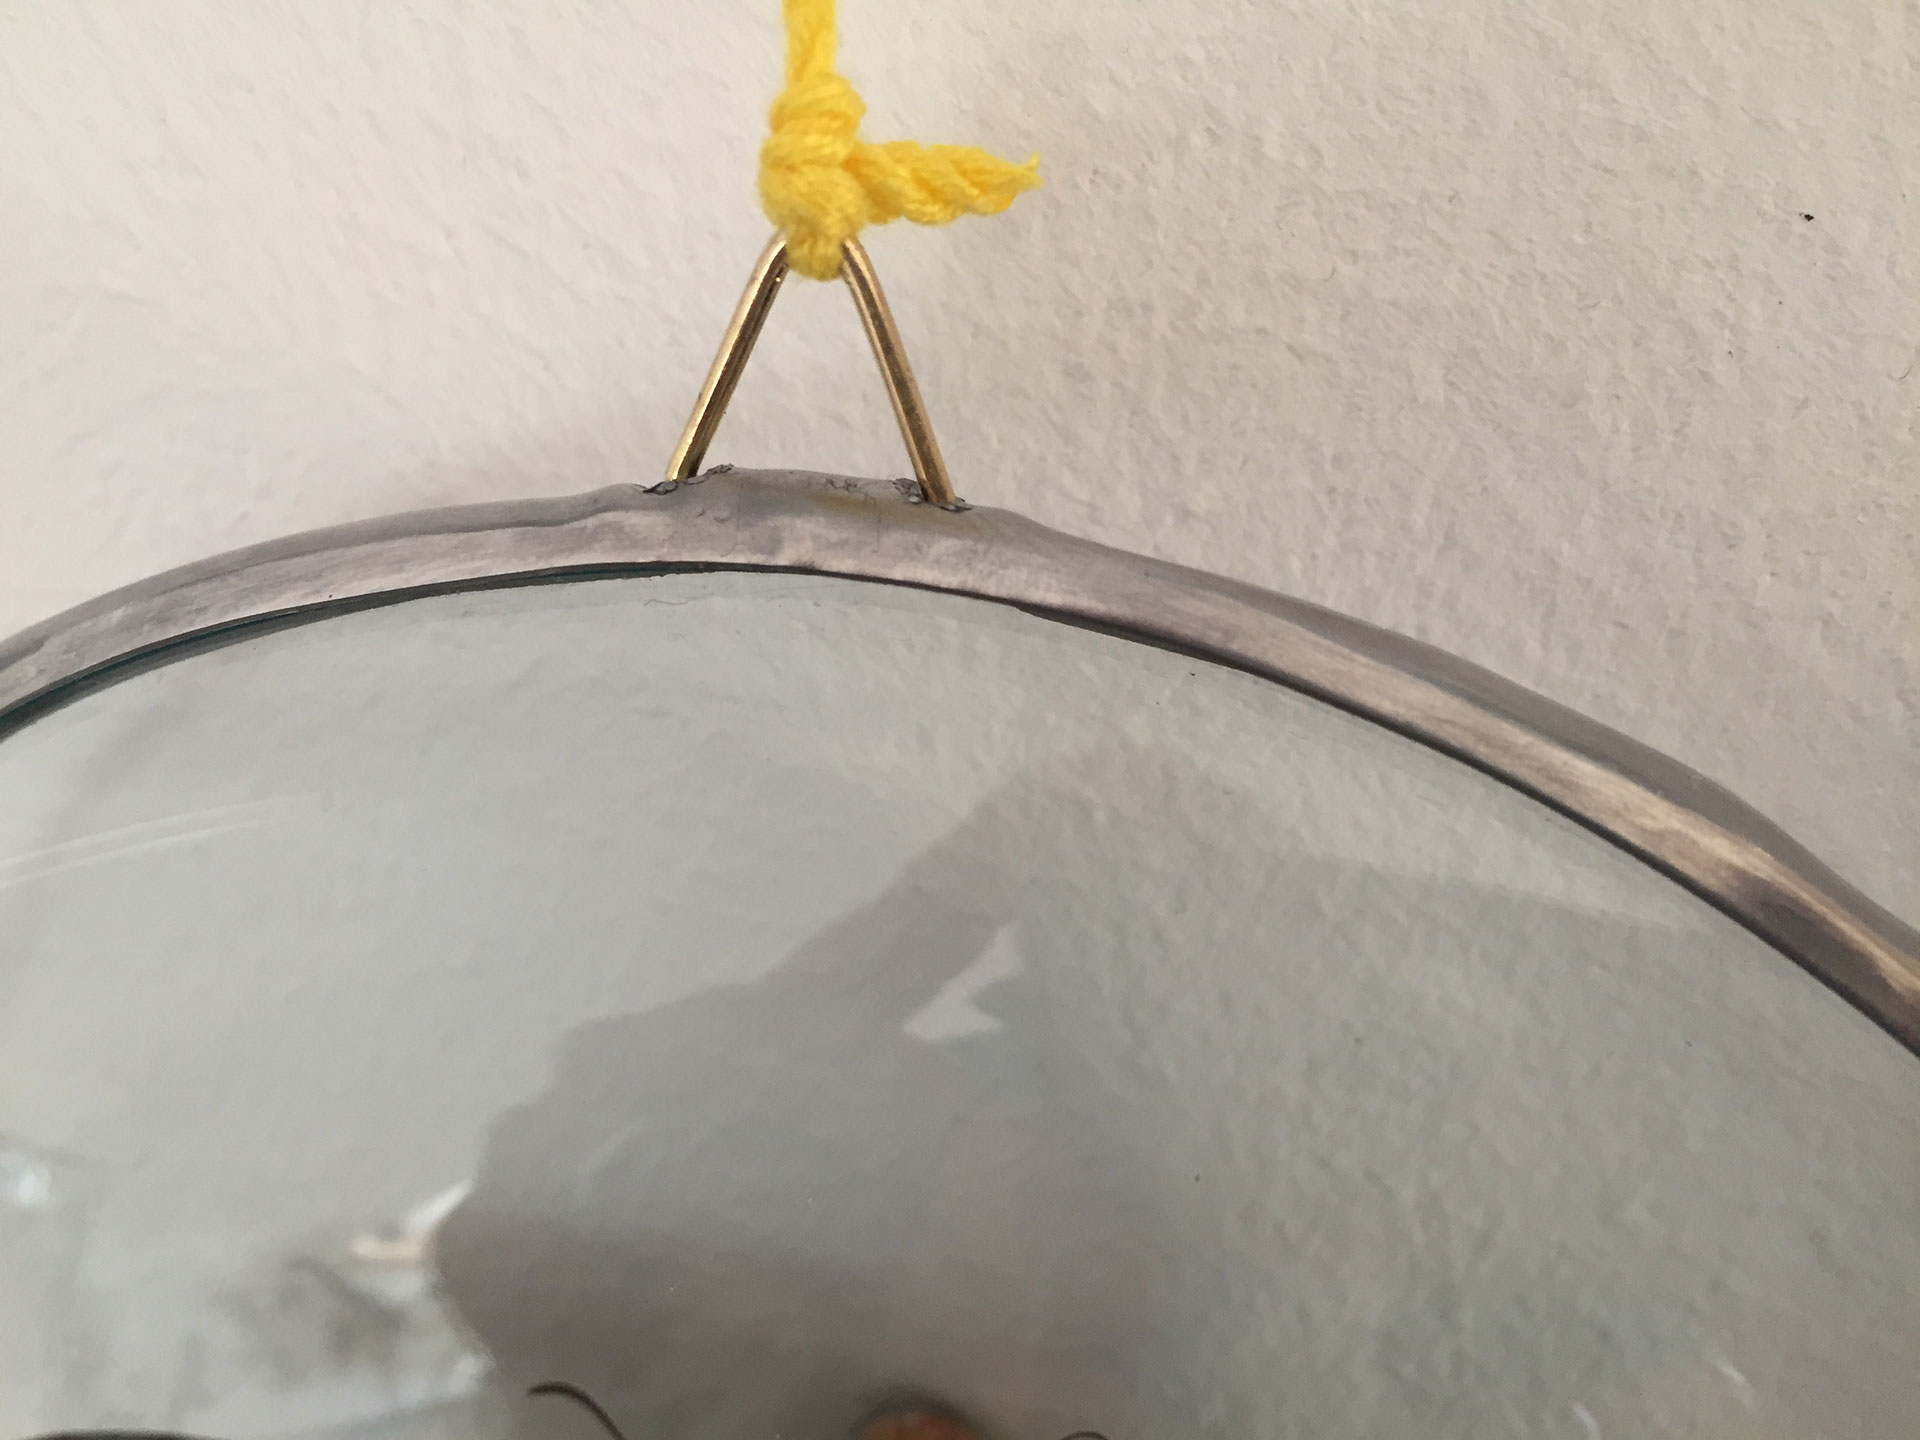
The leaded strips came with two more spectacular advantages: First, the adhesive on the strips is strong enough to hold the two watch glasses together on its own – let’s scrape off the hot glue. Second, I was able to install a little triangular hanger directly in the strip. No more more sticky hangers blocking the view from the back.
My wife loves the set of butterflies which are hung in our living room. We actually like them so much, that more butterflies got ordered on ebay and now wait to be framed.
Now, without further ado:
Instructions: mounting butterflies in a round glass-only frame
Materials needed
- butterfly
- cork (corks from wine bottles work well)
- needles (if they are too long to fit into the watch glass dishes, you can trim them down with a side cutter)
- watch glass dishes – two identical dishes per butterfly, ca. 1-2 cm larger in diameter than the butterflies largest diagonal measurement (I got my Uhrglasschalen from here, but they took quite a while to deliver)
- oval lead band, 6 mm for a small rim, 9 mm for a wider rim (see picutres below), mine came from DecoBlei: 6mm and 9mm “CLASSICO”, self-adhesive, half-oval
- little triangular hangers (I ended up using just the metal part of the glue on hangers
)
Tools needed
- a pair of tweezers with flat ends (also used for handling stamps) – it’s worth investing in these, they make handling the butterflies soo much easier
- side cutter
- a set of hollow punches (I used them to cut the little cork mounts)
- a folder or some kind of plastic stick which allows you to push and flatten the lead band into position
- a pair of cotton gloves – if you don’t use these, there is no way to keep the inside of the glasses free from fat stains
- glas cleaner
- awl
- super glue
Step by step instructions
1. Create a cork mount by cutting a small butt of cork from a wine cork. The cork butt should be smaller in diameter than the width of the butterfly’s body and should be about 3 to 10 mm high – depending on the depth of your watch glass dishes.
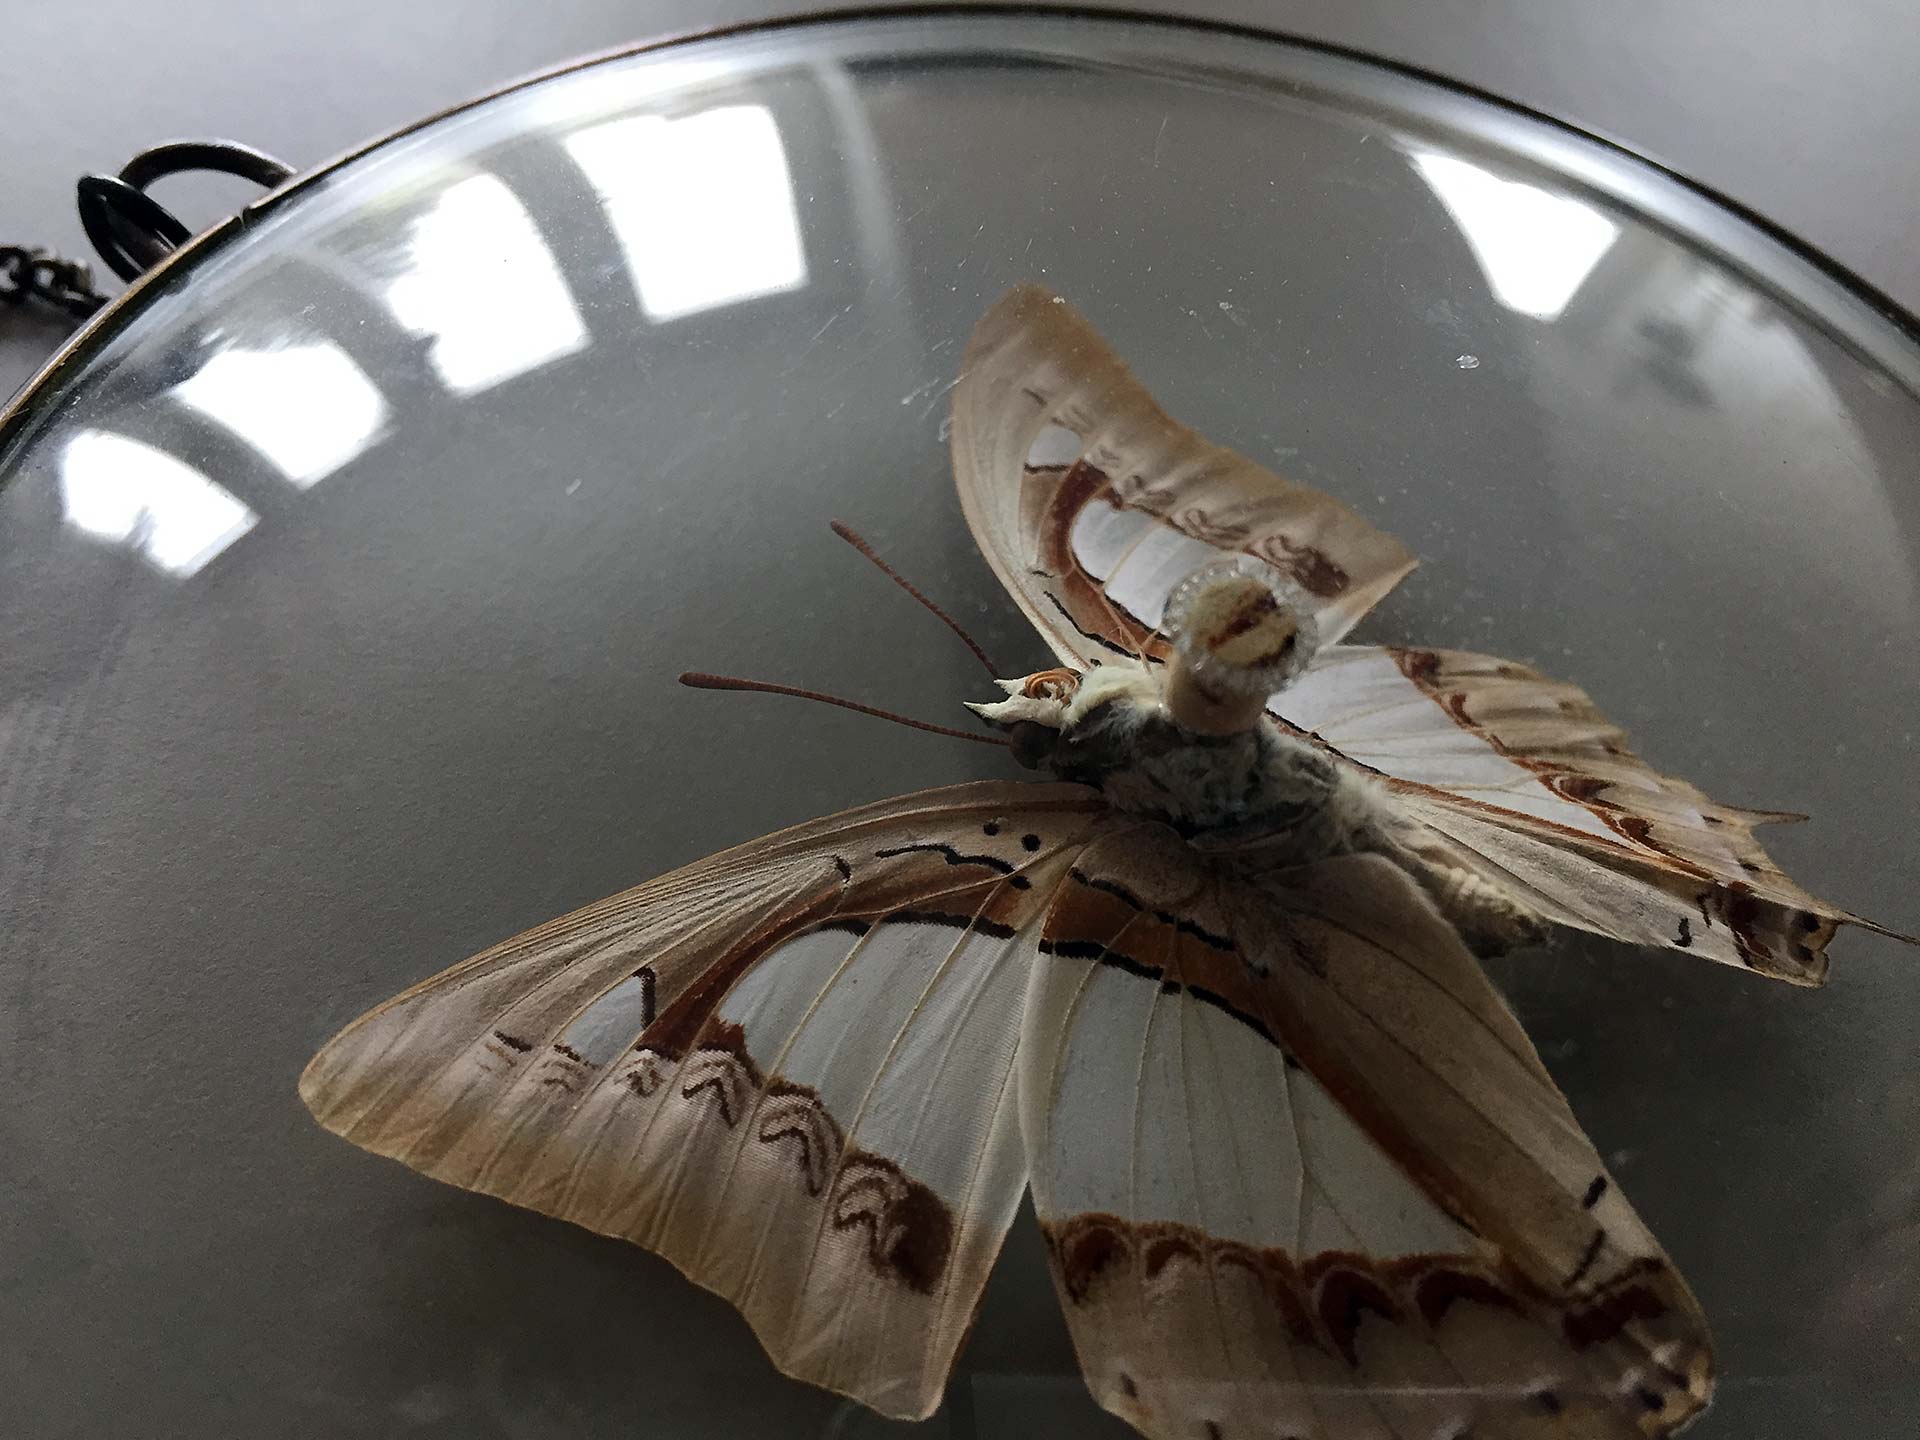
2. Now you have to pin the butterfly down to the small piece of cork. The tweezers are extremely helpful in manipulating the butterfly. I found it astounding how durable the butterfly wings are, when you use the flat end tweezers for holding and pushing.
A word of caution: never use your hands or fabric gloves! The scales of the butterfly wings will hook right up with a coarse surface and you will very likely tear off small pieces off the wings.
Once you have the pin in, the height of the whole setup (bottom of cork to top of pin) must not be greater than the inside of the two watch glass dishes when put together. (Yes, I know this is very obvious. I just thought I should say this once more before bringing in the super glue in step 4.).
If the height allows it, the head of the pin should stick out from the body around 10 mm.
3. Put on your gloves now. You would be astonished how easy it is, to mess of the glass dishes with finger prints (I speak from experience).
Now make sure that your watch glass dishes are clean on the inside. This will be your last chance ever, to get rid of fat, dust and anything yucky.
4. Put one watch glass dish in front of you, lying it on its back (it might be a good idea to put a folded t-shirt beneath to stop it from slipping around on a hard table top).
Take your little butterfly-on-a-cork kebab by the head of the pin.
Now try out where exactly you want the butterfly (and thus the cork) to be positioned inside the glass dish. Once you feel comfortable with where it is, make a mental note of the picture, take it out and then glue it into place by putting a drop of super glue on the cork and putting it back in.
5. Lay the second glass dish on top of the one with the butterfly. Check that the butterfly is centered in the glass dishes and does touch the sides as little as possible.
6. Admire your work! It is already very close to what it will look like once you are finished. Make your partner pat you on your shoulder, you deserve it. Take a little break and have a nice tea or a beer – whichever helps you calm down for the final steps.
7. Prepare the lead band. Cut off a piece roughly 3 cm longer than the circumference of your glass dish.
Now install the hanger in the lead band: With the awl, poke two little holes into the lead band. Put the first hole right in the middle of the piece of band – length-wise and width-wise. The a second hole should be in the middle width-wise and as far apart from the first hole, as the base of the little hanger-triangles is wide.
Now you have to thread the little hanger through the two holes. At the end it should sit in the lead band like a – well – like a hanger. Cut away the middle part of the bottom side of the hanger with the side cutters to get this done.
8. Now comes a tricky part, which will make you want for another pair of hands. You have to hold the watch glass dishes aligned, one on top of the other. At the same time, you will be wrapping them with the self-adhesive lead band.
Things get a bit easier when you fasten the two glass dishes with a set of rubber bands.
Start with the middle of the lead band which contains the hanger. This needs to go exactly where the top of the butterfly is. Continue from here and work your way around either side of the glass dishes. Finally the two parts will overlap at the bottom. I would suggest to trim down the overlap to about 1 cm, but that’s optional.
The lead band is quite soft. This makes it easy to flatten it and massage it into place using your folder. Carefully rub down the overlapping ends, so that the self-adhesive glue holds tight.
And voilà: you made it! Congratulations!
I hope my instructions inspired and helped you to produce a framed butterfly which you like having in your home or giving away as a present.
Please let me have your feedback or questions in the comments.
Sources
- How to Spread and Mount a Butterfly (pt. 2, pt. 3a, pt. 3b, pt. 4) – interesting video on the basics of mounting and installing a butterfly in a frame
Hi!
Found your site from a youtube comment. These are amazing! I have been looking for a cool way to display insects for decor as well as being double sided for illustration references. One question, from the like for watch glass you provided, did you use glass made of soda or the more expensive Boro glass?
Hi, I am happy to hear that you like the framing. I see them every day in my living room and I must say I still like them!
The glass I got was the cheaper kind – soda. I have no experience with boro silicate, but I didn’t find any problems with the soda based glass.
If you create some framings, I’d be really interested to hear and maybe see, how they turned out.
How have these held up over the years? I just came across this and would love to change over my butterflies to this style.
Hi Brittany,
they still hold up perfectly (except for one – but that was taken down by one of our cats).
I recall that there was one, where the cork got loose from the glas a few months later. I don’t know why – maybe I did not use enough glue or did not press the cork down good enough. I managed to take the lead band off, glue the cork down and put the lead band back on. I even used the same band – the sticky stuff was still good enough.
I made sure though, not to hang them in a sunny place. Direct sunlight will fade out the colors of the butterflies over time.