
Wouldn’t it be good, if you could train FPV flight with a flight simulator on your compuer, using your actual transmitter (in this case the FlySky i6) as controls?
Most instructions explain how to do this by soldering a cable with a trainer port (S-VHS) to 3.5 mm audio connection. Instead if building a specialized cable, my DIY guide will explain how this can be done achieved by adding an audio jack directly to the transmitter, so you can use a standard audio cable (which you might already have).
I am trying to build up my multicopter skills step by step, before jumping all in into high speed FPV flying and crashing my first expensive drone. For that reason I currently practice with my micro FPV indoors. It’s an Eachine QX95 which I like a lot and modified a little. I also read up on the technical (I might want to build my own drone sometime later) and “howto fly” side of things.
My then extensive work of getting everything up and running resultet in:
I finally found out what I was doing wrong all along, in an utterly insignificant little blue-green forum comment in the uncharted backwaters of the unfashionable end of the western forumsphere of the internet:
Umm – I should be switching it to student mode?
Thank you Spartacus Rex, thank you!
I spare you further details of the production mishaps. What follows is the diy instruction for successfully getting the FlySky i6 (Eachine i6) connected with a FPV simulator, using a 3.5 mm audio cable.
Instructions:
Flysky i6 modification to connect with computer via 3.5 mm audio cable
Materials needed
- a 3.5 mm audio socket (e.g. like these)
- a 3.5 mm male-male audio cable (long enough to reach from your transmitter to your PCs mic input)
- two thin wires, 15 cm each should suffice, for wiring up the jack inside the transmitter
Actually, I had all of the above just sitting somewhere in boxes and little drawers of my collection – lucky me :-).
Tools needed
- soldering equipment
- Philips screw driver
- multimeter
Step by step instructions
1. Remove all batteries from the TX (better safe than sorry…)
2. Unscrew the transmitter (four Philips screws at the back)
3. Fully separate the two parts (the “front” with all the controls) and the “back” with the battery compartment and trainer port). In order to do so, pull the two white plugs – the one connecting the batteries and the one connecting the trainer port.

4. Drill a 6 mm hole into the back part. Choose a place where the 3.5 mm audio socket will have enough room once it is fastened in place and the transmitter has been put back together. It should not touch any other component.
For me, the best place I could find for my jack was in the lower left hand side, inside that little “foot” that is on the bottom:

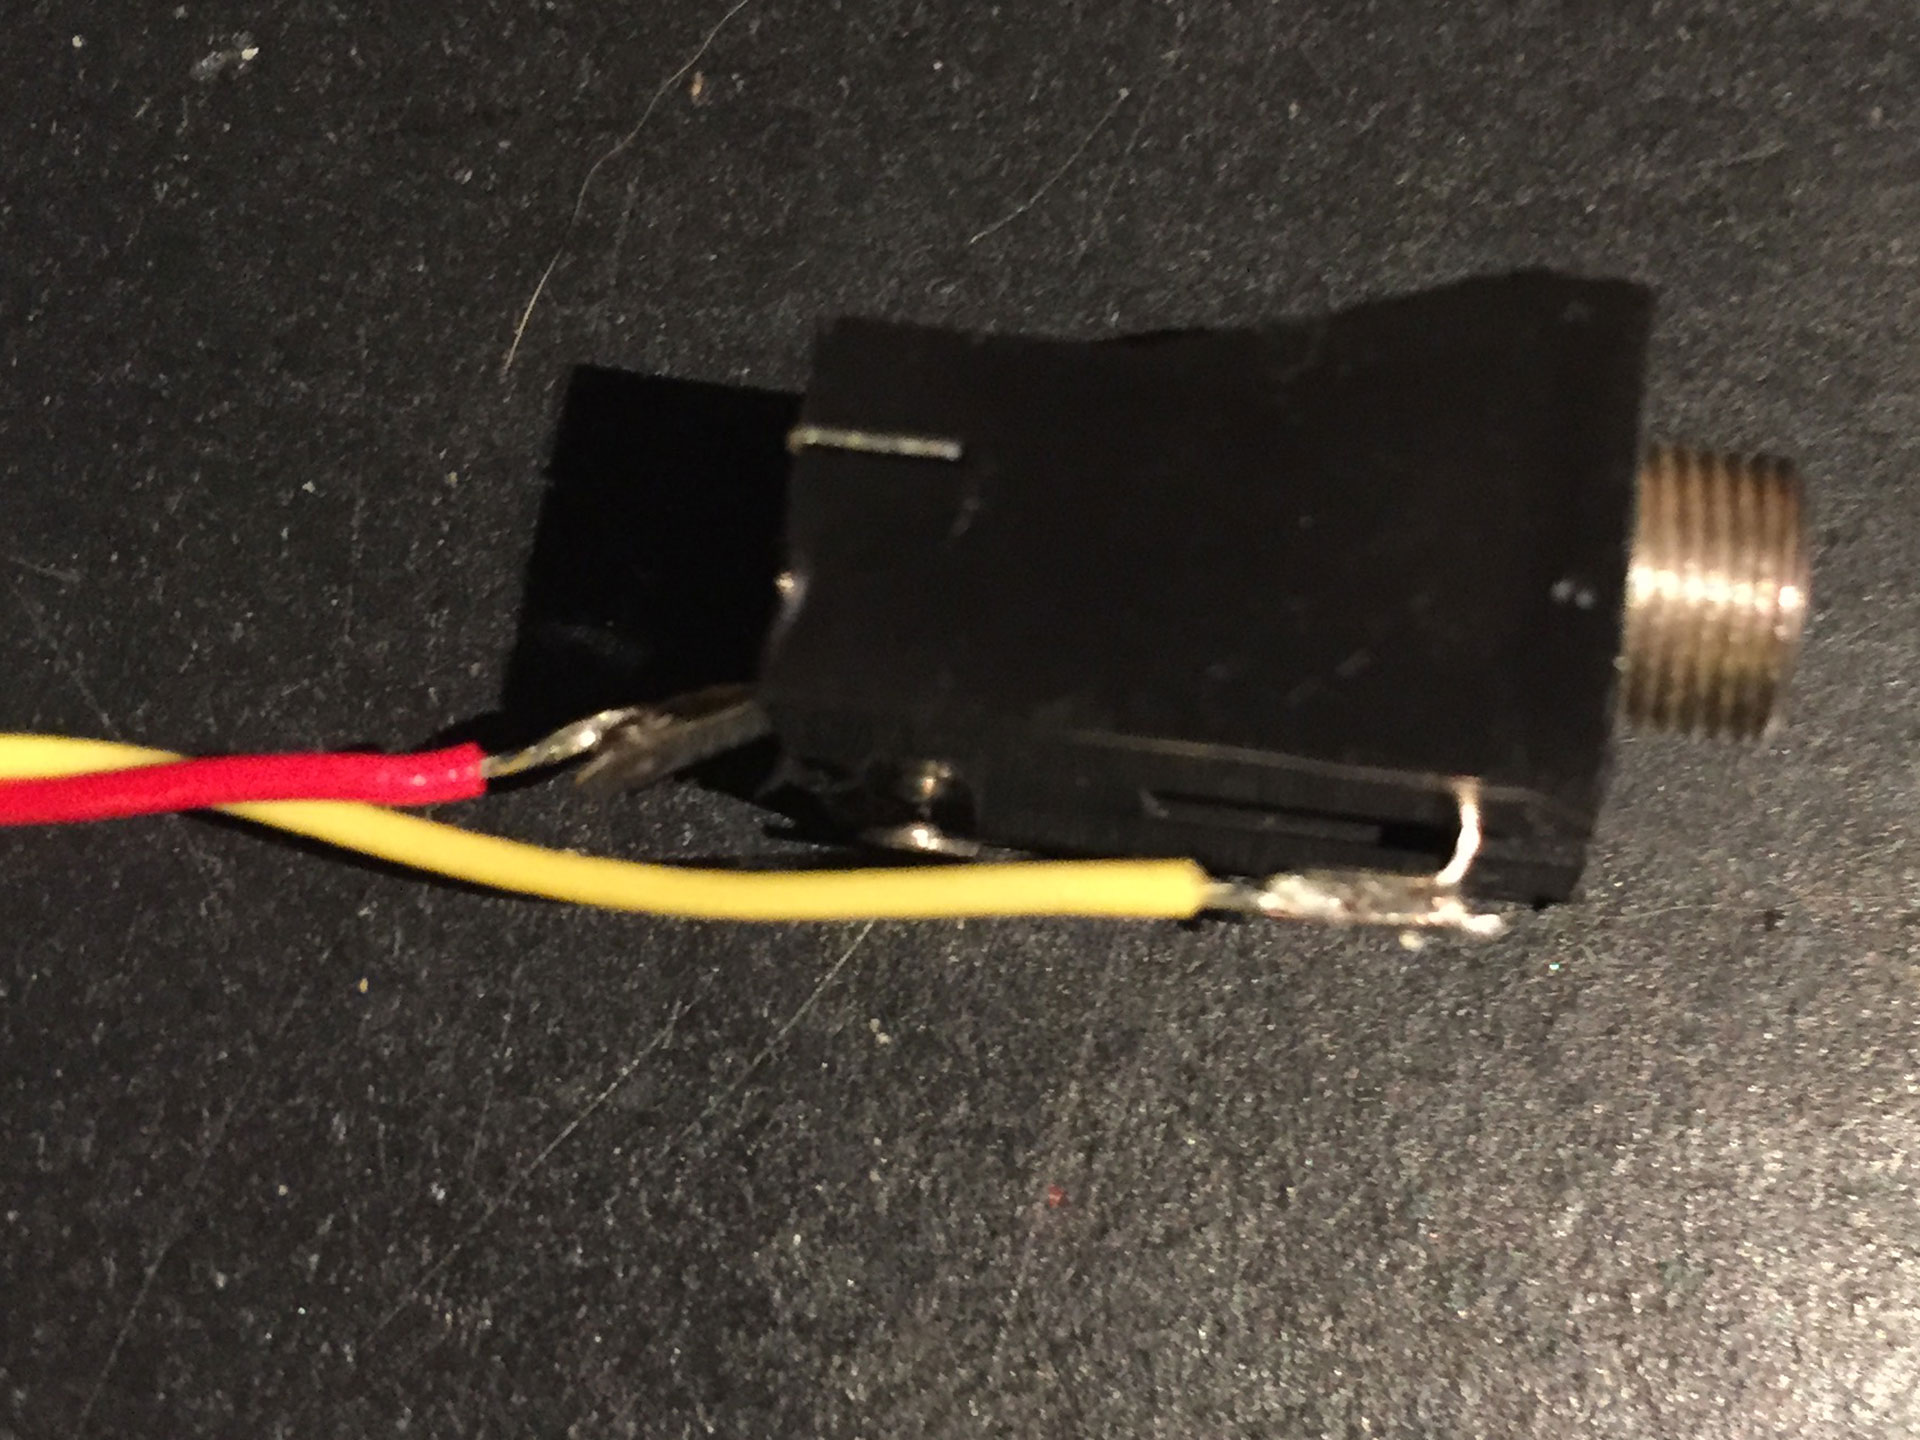
5. Solder two wires to the audio jack:
- the “signal” wire (mine is red) goes to the connection for the tip of the audio plug
- the “ground” wire (mine is yellow) goes to the connection for the sleeve (the very back) of the audio plug
6. Fasten the audio plug in place. For me, this included shaving off parts of the plastic housing, as it would not sit flush against the inside of the transmitter casing otherwise.
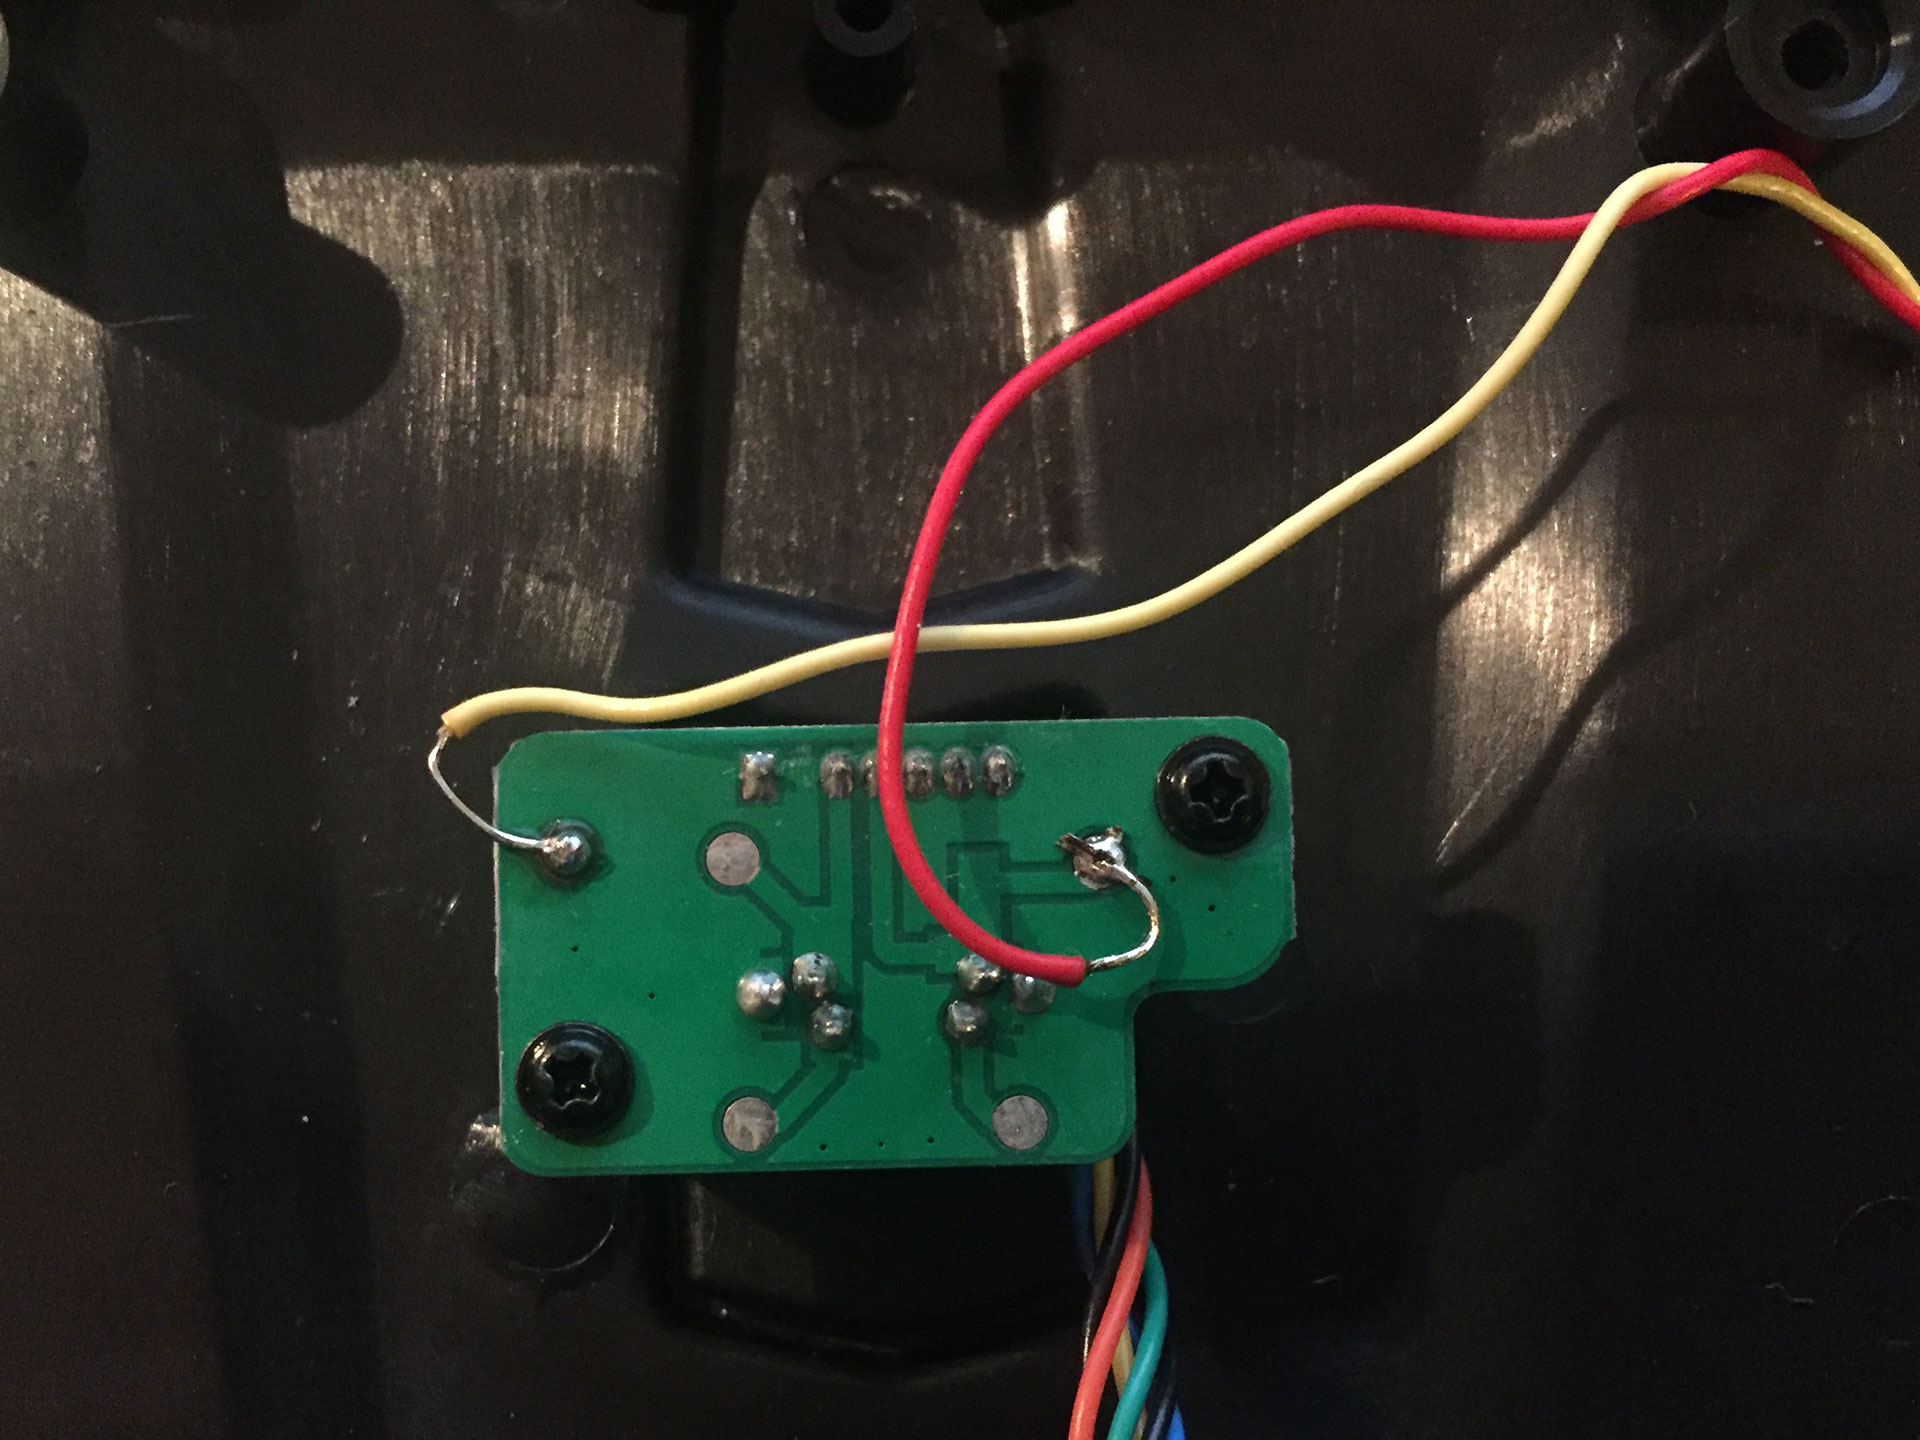
7. Now solder the wires to the soldering points on the circuit board of the trainer connector. As you can see, FlySky generously provided us with big soldering points. So we should really make use of them! Before soldering, cut the cables down to a length where you have just enough to lay it down flat inside the back of the transmitter.
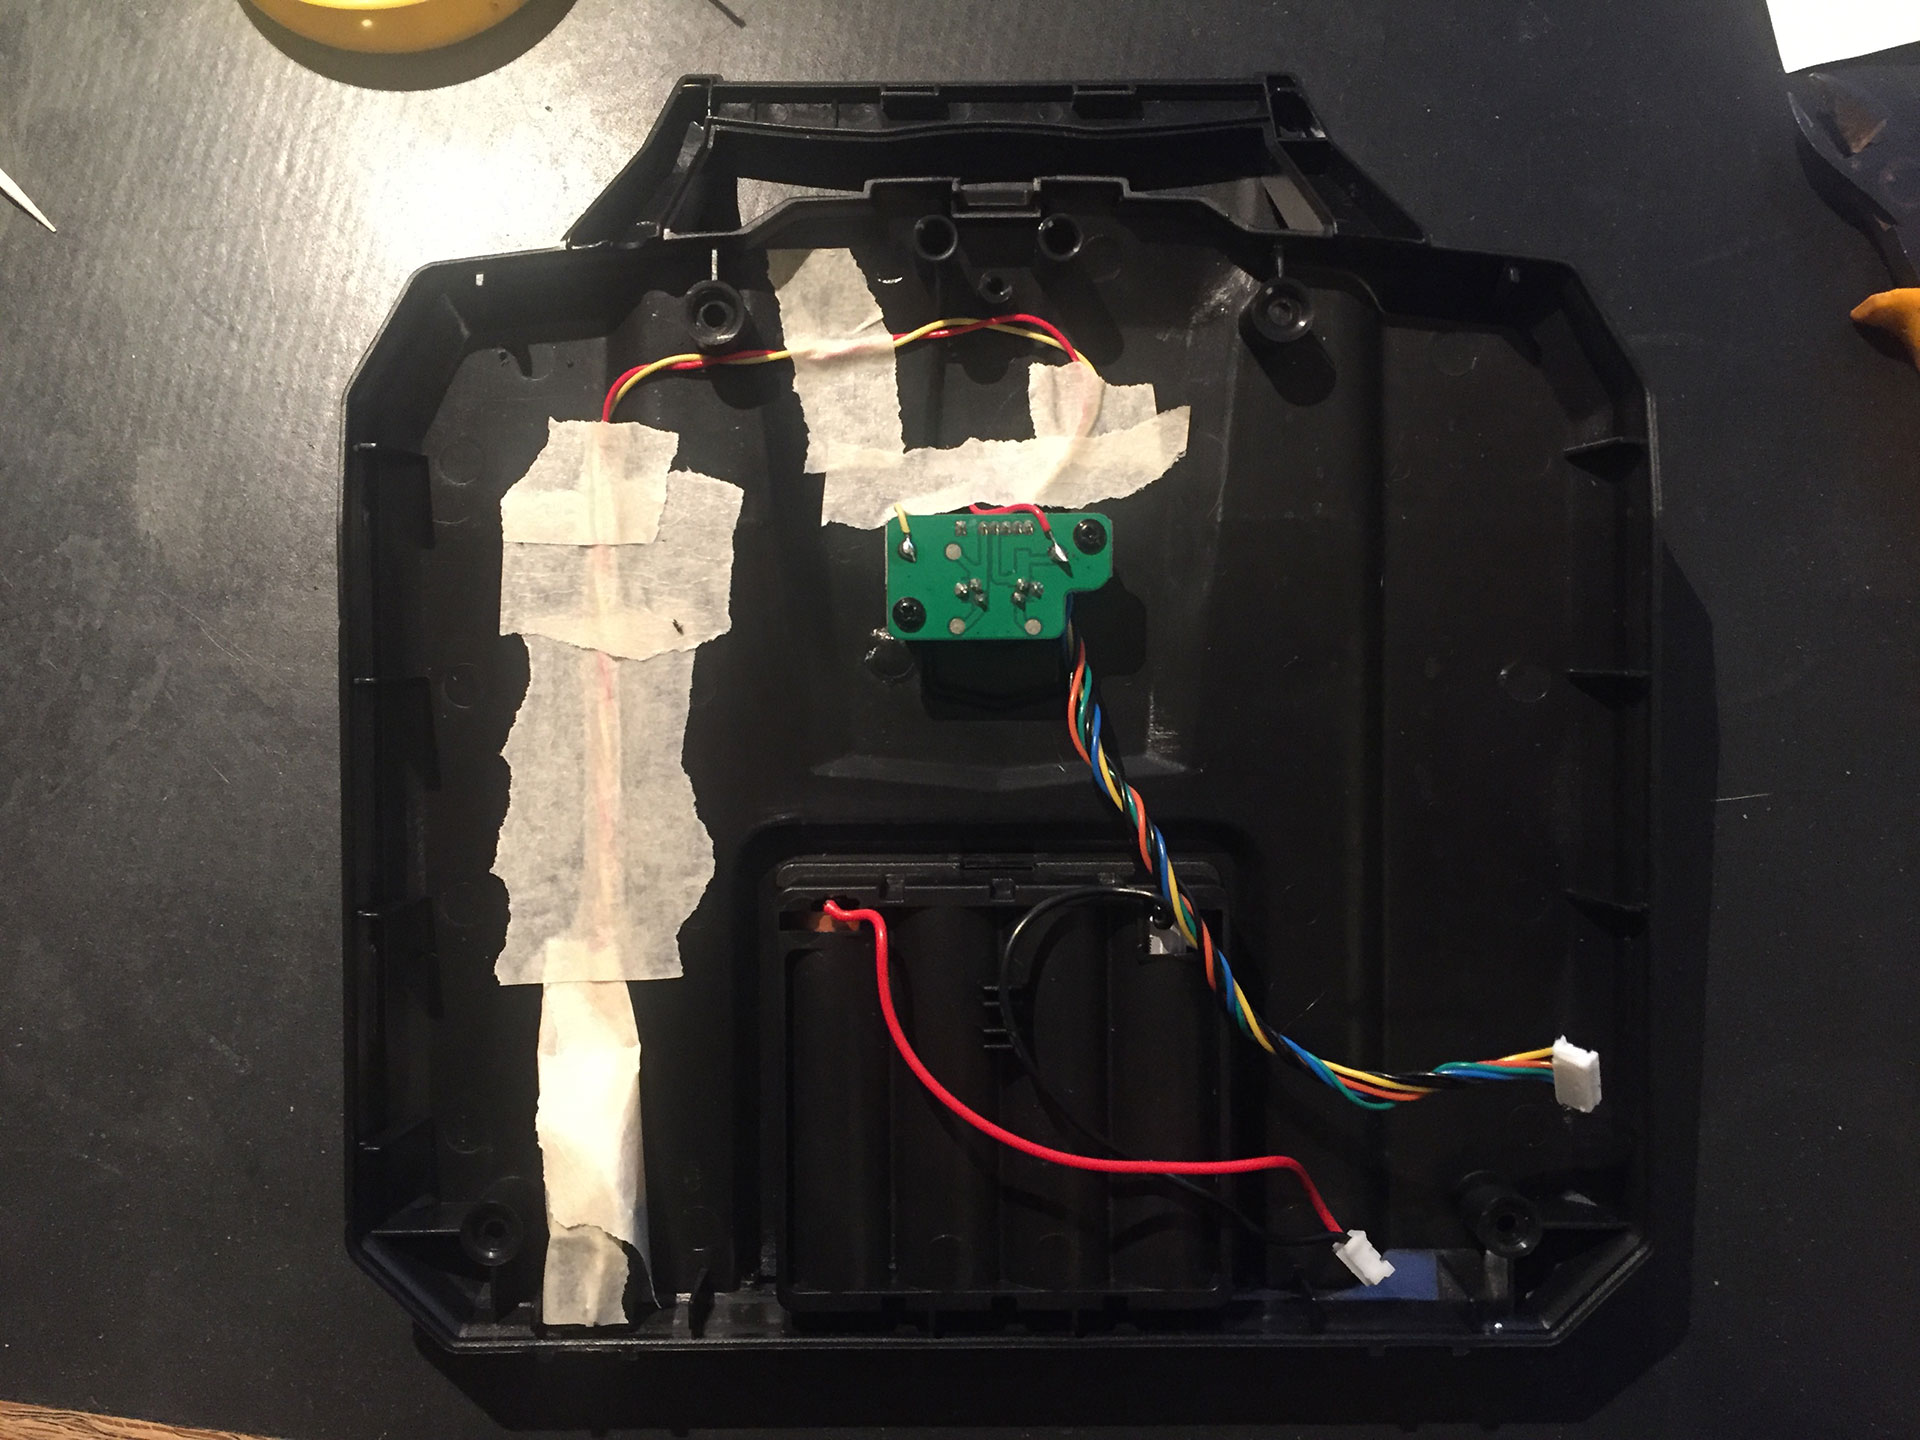
8. Tape down the full length of the cable. We want to minimize the chance, that something goes loose and interferes with the transmitter just when we try our first loops…
9. Re-plug the back part and screw everything back together.
10. Haha – did you really tape the cable down and put everything back together without testing your setup or at least reading all the steps first? You really should have!
8. (For real now :-)). Plug your audio cable (male-male) into the new socket which you just installed. Use the continuity check feature to ensure, that:
- there is a connection between the tip of the audio plug and the soldering point with the signal cable
- there is a connection between the sleeve (the conductive part furthest away from the tip) of the audio plug and the soldering point with ground cable
- you cannot find any other connections between soldering points and the audio plug
Also check, that with the batteries back in, the transmitter works as expected.
9. Now tape down the cables and put the transmitter back together.
10. Install SmartPropoPlus and run it.
11. Connect your transmitter to your microphone audio jack of your computer.
12. Set your FlySky i6 to student mode. In order to do so, hold both horizontal trims inwards while powering on the transmitter. Then press “ok” for a second and the menu will pop. Finally select “Student mode”, which is part of the “System” menu, a few clicks down.
13. Success!
At least, that’s what I hope you achieved. There are (as always) a few things which can go wrong. On the SmartPropoPlus website there is a really helpful section about setting up the system correctly.
I keep my fingers crossed, that your project turns out well and that you will feel pleased with what you accomplish.
If not, I can recommend the sources I am giving below, at least they were helpful to me when I did this.
You can also contact me via a comment and I’ll try to help as good as I can.
Also, please let me know how you liked this article. I am happy to take in constructive criticism, but I am also open to praise ;-).
Sources
- how to: connect your rc controller to pc simulator FlySky FS-i6 on YouTube
- Cable para TGY-i6 y FlySky-i6 – Español on YouTube
- QUADCOPTER FLIGHT PRACTICE
- Getting-FlySky-FS-i6-controller-to-work-with-FPVFreerider-Simulator
- SmartPropoPlus
- WinScope (it’s like an oscilloscope for your microphone input – can be used to check what kind of data is coming via the sound card, without using SmartPropoPlus directly)
I don’t know if you’ll see this comment but if you do, man this is the best article i’ve ever read in my life. Everything written at the start related to my situation. I’ve been at this for hours fiddling with different wire combinations lol. The student mode was what i needed to know thank you so much!!!!
Thank you! I am glad to hear the article helped you out 🙂
Smartpropoplus shows my sticks to be wiggling around ever so slightly and makes the sims go crazy and unusable. What did I do wrong?
Did you set the remote to student mode (step 12)?
I am new to to RC flying. After buying the Flysky i6X I looked at many videos on how to set it up so I could use it on my Clear View SE simulator. In a nut shell they said to get a mini 4 pin Din plug cable and wire things up to a 3.5 stereo jack and down load the SmartPropo Plus software.
This seemed all well and good, but after finding your post on how to install a 3.5 mm jack in the Flysky transmitter, a trip to Radio Shack for parts made this so much simpler. Thanks for such a good post.
bastian,thats it your the chosen .crystal clear and i wish there were more people like you.thank you thank you thank you.you rock .keep up the good work.oh and hows flying been going?and what are you flying nowadays.thanks again.
Hey Joe, thanks for the praise! I am really happy to hear that the article helped you.
I must admit, I haven’t flown in a long while… I tend to loose interest in a topic, once I have understood the basics and then I hop on to doing something else… currently I am woodworking a lot 🙂
i found a premade cable that is trainer port to usb that works great also.i wish i had found it a day sooner.oh well .got two options now.
If you read this: please add a link to that premade cable here as a comment, I am sure that’s helpful for a future reader of this howto.